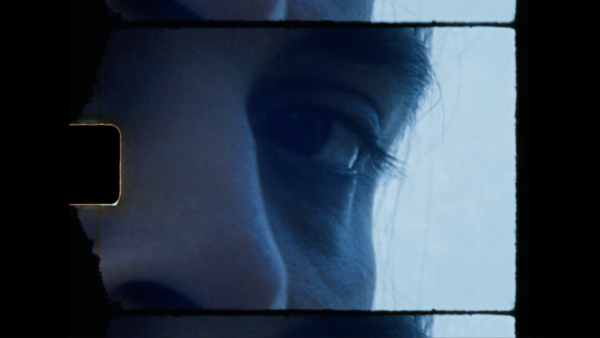
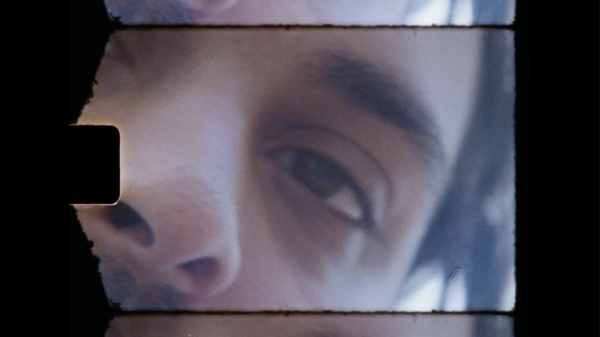
Since Super 8 is so popular right now, I wanted to just write out a quick and dirty overview of my own Super 8 filmmaking process here in New York City. There are other post houses and places you can buy the film, but this is what I’ve been doing for over a little over a year now and works for me.
Super 8 Camera
There are many types of Super 8 camera out there, all of them vintage. Mine was a gift from my SO, so I didn’t have to struggle through the search for a camera myself, but if you’re looking to buy one, make sure to get one from a reputable camera store that has TESTED the camera to verify that it works. It’ll cost more to have that test done, since they have to shoot and process a roll of film on their end to make sure everything works, but it’s worth it to make sure you get a camera that’s actually functional instead of a dud.
Minolta is a good brand and was a giant in its day. I use the Minolta XL-400.
These cameras are OLD and it’s a small miracle that so many have lasted til today – it’s not uncommon for these machines to stop working. I actually have a colleague whose Super 8 camera broke down after about a year of use. And if yours breaks, it’s more expensive to have it fixed than to just buy a new one! But despite these risks, if you have the means and shooting film is something you truly want to try, I have to say there’s really nothing else like it. That moment when you get your film processed and see what you’ve created for the first time – that’s movie magic.
Film Stock
I buy my film from B&H Photo Video, which is one of the go-to photo / video stores for the NY photo/film industry (another being Adorama). B&H is located in Midtown at 420 9th Ave, New York, NY 10001, and nearest subway is 34th st. Penn Station, or you can order online (https://www.bhphotovideo.com/c/search?q=super%208%20film&sts=ma).
The number on films stocks basically is equivalent to ISO in digital video. So higher the #, the more grain you’ll get as well as more light sensitivity.
The film stocks I’ve used are:
Kodak VISION3 500T Color Negative Film #7219 (Super 8, 50′ Roll) – 500 ISO equivalent, tungsten balanced so it’s gonna have a blue tint in outdoor/daylight settings unless you set your camera for daylight (which physically places a yellow filter over the lens and therefore cancels out the blue tint). I’ve found that even when I forget to do that part, Metropolis Post fixes the color balance issue in the grade. Best for low light environments.
Kodak VISION3 50D Color Negative Film #7203 (Super 8, 50′ Roll) – 50 ISO equivalent, daylight balanced so it’ll have a yellow tint in indoor/tungsten/low light settings. Best for bright outdoors day light environments.
Kodak VISION3 200T Color Negative Film #7213 (Super 8, 50′ Roll) – 200 ISO equivalent, tungsten balanced, similar to the 500T. Just less sensitive to low light than the 500. If you want something that’s a little less grainy looking but you’re still shooting indoors/tungsten/low-ish light, then this is a good general purpose option. Personally this is my go-to general purpose stock that I use for both outdoor and indoor settings. I tend to stock up most on this because of its flexibility when I’m working in unpredictable environments.


Kodak Tri-X Black-and-White Reversal Film #7266 (Super 8, 50′ Roll) – Black and White. Fairly grainy, but if you really want that vintage look in your project, it has all the character and nostalgia factor you’re looking for. I used this film stock in my music video for S-Dee “I Follow You” so check that video out if you want to see this stock in action. Keep in mind that this stock cannot be converted to color, so if you use it, you’re committing to the black and white look!
Kodak Ektachrome 100D Color Transparency Film #7294 (Super 8, 50′ Roll) – 100 ISO equivalent, a special film stock that produces a color “positive” instead of a typical color “negative” once it’s processed. This allows you to project it if you can get ahold of a vintage film projector. I find that between the Kodak options and this, Ektachrome film stock has the look that most people imagine when they think Super 8 film. The quality of the grain, the intensity of the colors, and the crunch of the darker shadows produced by this film stock are most reminiscent of that typical old “vintage” look. So I would say that if you were say, working on a narrative feature where there had to be a few clips of some characters’ childhood or something from way back, then this would be the film I’d use to really get that “authentic” look.
Film Processing
There are a few processing houses around NYC and Jersey, but my preferred is Metropolis Post (115 W 30th St #1209, New York, NY 10001. Nearest subway is 34th st Herald Sq. Phone # (212) 563-9388).
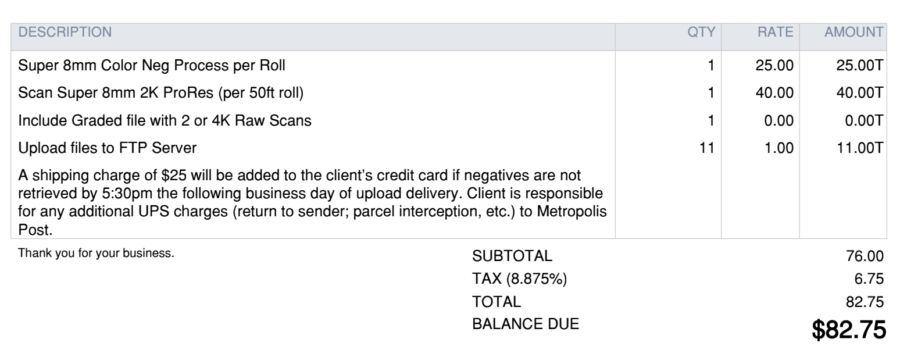
Here is a screenshot of a part of my invoice for processing 1 single roll of Super 8 film at Metropolis Post. I believe it was a Kodak 200T but all the Kodak stocks cost the same to process as far as I can tell.

It takes 3-5 days for the film to be processed. If you have a deadline, be sure to calculate processing time into your post workflow. They email you the invoice once it’s ready. You confirm that they can run your card to pay for the processing, then they send you a google drive link so you can view and download the footage. These files can be quite large, so only go this route if you have time to spare or an excellent internet connection!
Line 1: Cost of film processing. They treat your exposed film with chemicals to “fix” the exposures, meaning that even when the film is exposed to light again, the images on the film won’t be altered in any way. Fixing the film allows them to scan the film.
Line 2: Cost of digital scan of the film. This invoice is also for 2k scans of the footage. Personally, I don’t feel the need for more than that as I export at 1080p most of the time anyway. 2k for me is plenty of detail. But you can opt to get 4k scans as well (it’s more expensive!).
Line 3: Color Grade (optional). This means they will send you both a RAW file with flat color, PLUS an additional file where they’ve added a simple color grade, which is great if you just want ready to share video files right “out of the can” so to speak. Personally, I can get nit-picky when it comes to grading, so I’m happy to let someone else do this process for me and just have footage I can edit ready to go. If any of the shots really pop out to me as needing more fine tuned color, then the RAW is always available.
Line 4: Cost by # of gigabytes of uploading your footage online for you to download. Metropolis Post uploads to Google Drive. The above invoice is for 11 gigs total – in my case, it’s for both the color graded footage as well as the RAW.
Unlike digital, once your film is processed, there is a physical roll of film you need to pick up! At Metropolis Post, they give you the option of getting mailed to you for a fee, or you can go grab it yourself. I always opt to pick it up myself. Remember to bring a mask! They have a sign on the door that says masks are needed (it’s a small space, and not too many windows as far as I can tell, maybe that’s why?).
They give you your film in a manilla envelope, and you’re good to go.
Notes on Shooting Super 8 Film
When it comes to actual shooting, every camera is going to be different, so read any instructions that come with your particular camera and try searching your camera on YouTube to see if anyone else has shot with your camera specifically and has any demonstrations.
I suggest that with your first roll of film, don’t be too precious with it. View it as a test roll, and try and shoot various environments / subjects using different camera moves and techniques. You’ll only really know what worked and what didn’t AFTER your film is processed, so use this as an opportunity to experiment. You might be surprised at the results!
Real film = Global Shutter. No rolling shutter warping. So things like handheld camera moves and blur will look very different than digital. (I love doing whip pans with film because instead of warping and stretching the image, what gets stretched is the light as the frame is exposed over time. You end up with some fantastically abstract smears of light and color that are very impressionistic, and more akin to a long photo exposure than a video blur.)
My camera has a little mechanical light meter – a triangle that pops into view when the environment is too dark to shoot in. This triangle goes away when you switch to a brighter environment. But don’t worry, even if that triangle is present when you’re shooting, the triangle WON’T get burned into your film. It’s just a meter visible to the camera operator.
You can take your film roll cartridge out of the camera even if the roll isn’t finished! Don’t worry, it won’t ruin your whole roll of film – BUT it WILL expose the 4-5 frames that are visible, but other than that the rest of your footage will be safe. Once processed, this will present as over-exposed film burn / light flares in the footage between shots. Sometimes I do this intentionally to make a practical transition between “scenes” in the film.
If your Super 8 camera shoots 18FPS like mine, then you might want to shoot each shot for a little bit longer than you normally would. That’s because when 18FPS conforms to a 24FPS timeline, everything gets sped up due to the missing 6 frames.
When the film roll finishes, my camera makes a different sound when you hit the roll trigger, plus the feeling of the roll rotating inside the machine feels different in my hands. You can also tell if a roll is done by taking it out of the camera and looking – if the film is a different shape then it’s done.
Notes on Editing
Once you have obtained the digital scans, you can edit the video like you would any other digital media.
There will be NO sound.
Careful with shooting lens flares. One of my favorite things to shoot with digital are lens flares, using the LCD monitor as a barrier between the eye and harsh UV rays or harsh bright concert lights. If you’re used to shooting straight into bright lights like I am, then BE CAREFUL. Unlike digital cameras which have the digital readout of the image as you’re shooting, the image you see through the viewfinder of a vintage cinema camera is the actual thing. So if you’re shooting into the sun for a back-lit lens flare, you’ll actually be looking into the sun.
I like to keep the frame of the film in my edits, but you can push in or crop it out for cleaner edges.
I like to do minimal editing, because in a practical cut, you’ll see the frames shift from the bottom to the top, whereas a digital cut will show no transition. These details affect the aesthetic of authenticity.
Last Notes
I’ll probably be updating this post with more pics and screenshots as examples, but wanted to just get this out there in case it helps somebody else. Before I shot Super 8, I was really intimidated by the whole idea of working with film. I was very comfortable shooting digital, but the mechanical aspect of a vintage camera and real film rolls seemed too foreign and complex. I also had a hard time finding straightforward resources on what these things would cost, so the price tag was intimidating too. But after I got my hands on a camera and actually shot with it and went through the whole processing thing, I realized it was super easy! There’s a few more steps and things to be aware of than your typical point and shoot digital cameras, but every aspect of the process is extremely user friendly and easy to understand.
Super 8 is the most accessible medium for anyone interested in working with real film. I think it’s a good introduction to film work flow, and a good way to learn about the qualities that film has to offer that digital doesn’t have. It’s also a way to connect to the history of filmmaking – I have to say that working with real film made me feel like a film-maker more than I ever did before. It may not be 16mm, but magic is still there.
Enjoy the process!
-Lee